Cross Stitch Patterns from Fine Art by Scarlet Quince
 Cart 
 Wish list
     |     
     |     
Check out
     |     
     |     
Wholesale log in
Member services
*** October sale! Everything is 10% off through October 15! ***
Scarlet Quince
Goodies
Become a Member

Scarlet Quince Ramblings

Cross stitch ... art ... life

Floss storage systems I have known
Thursday, July 2nd, 2015

How do you store your floss? Not the floss for the current project, but all the leftover floss and leftover bits of blended colors from previous projects, or projects you were going to stitch but didn’t.

For a long time, I kept all my floss in a couple of boxes. I think there was some in a plastic grocery bag too. But I got tired of digging through an increasingly large pile of floss for colors that were supposed to be there but somehow weren’t (have you ever thought you bought 5 skeins of 430 but were finally forced to conclude that you bought 5 skeins of 431 instead?).

So I tried some other things. Here they are in the order I tried them (which is also, not coincidentally, in increasing order of cost).

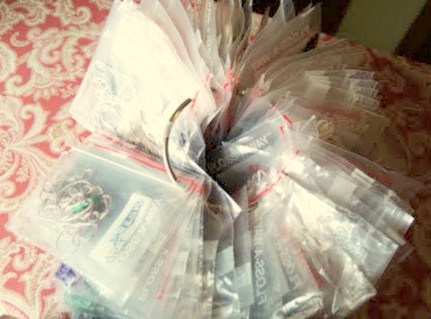
I had someone who was going to stitch a model for me find that she couldn’t do it and send all the materials back to me, so I had a lot of baggies with partial skeins. I decided to put ALL my floss in baggies, stick one end of a paper clip through a corner of the bag as a hanger, and then thread the paper clip onto a wire coat hanger. I filled up a couple of coat hangers and hung them in the closet. (The total cost was whatever a box of baggies costs plus a box of paper clips.) It looked fairly tidy and was out of the way, but still readily accessible. It was sort of a poor-man’s version of Floss-Away bags on binder rings. Unfortunately, it turned out that the paper clips tangled with each other so the baggies didn’t stay in order and it was hard to find the color I was looking for (and still hard to know for sure that it was or wasn’t there).

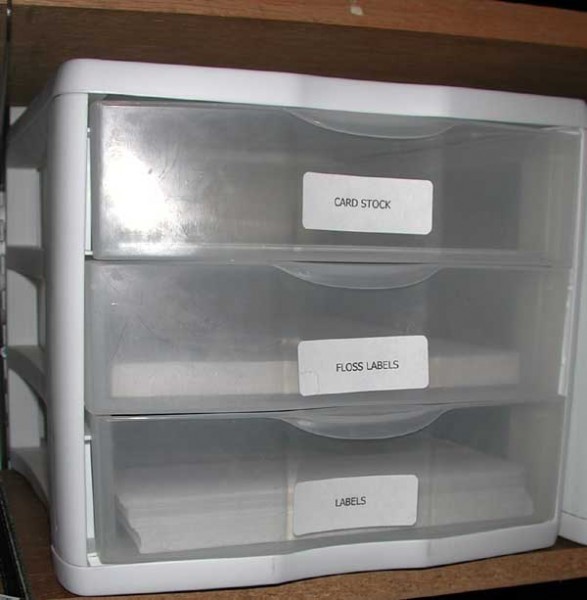
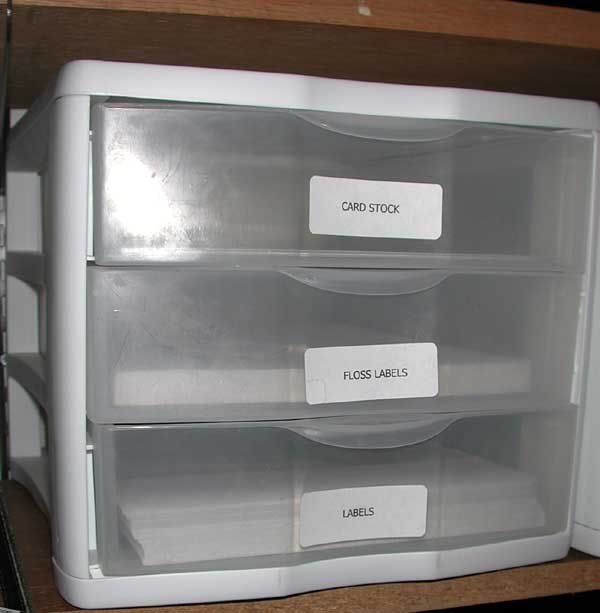
Then a friend moved away and gave me a bunch of those Sterilite chests of drawers (the size that will hold 3 reams of paper and can be stacked). You can get them at Big Lots. OK, I didn’t pay anything for these but I think they’re about $5 each. I needed some for Scarlet Quince supplies (cover stock, paper, labels, etc.) and devoted 2 of them to floss. I labeled each drawer with a range of floss numbers (200-499, 500-799, 800-999, 3000-3399, 3600-3799, and 3800-3899). I still had to dig through a pile of floss to find a color, but the piles were smaller. (Yes, this picture is of the drawers labeled for SQ supplies, not for floss.)

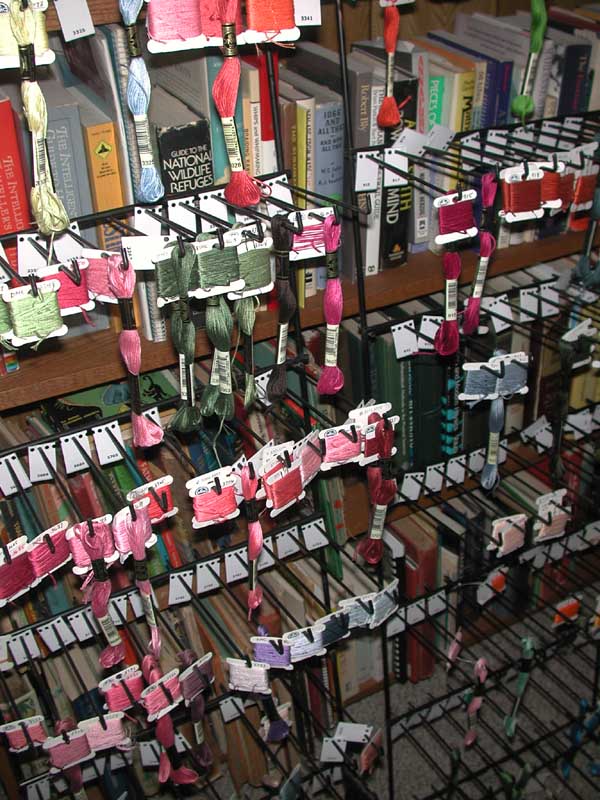
That continued until our local needlework shop, Ginger’s, went out of business. She sold all her inventory and all the store fittings, including the racks where she hung all the DMC floss. I got dibs on the floss racks, measured them, and went home and measured the space I had in mind for them (below a counter in the family room that connects to the kitchen, originally set up as a bar). I hypnotized myself into believing they would fit there perfectly and called Ginger and told her they would fit my space and I’d be back for them. I brought them home and they were not at all close to fitting. For a long time I didn’t put them up anywhere because you don’t want a forest of 6″ hooks anywhere where someone might stumble into them in the dark.

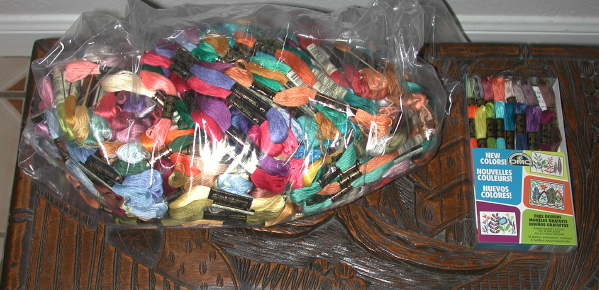
Finally I did put them up against the counter after all but they stuck up above the counter some. One didn’t fit behind the counter so I put it on another wall. They were made to go on pegboard but I just hung them on nails. I knew the floss would get dusty out in the open and I planned to make a cover for it but that didn’t work out. Our couch is a couple of feet away from the wall so there’s an alleyway behind the couch where I can get at the floss but it’s not a high traffic area. Nevertheless, somehow people kept crashing into the racks (especially the one on the end) and knocking floss off or knocking the whole thing down. Finally I got enough of that. I didn’t get a picture of them while they were on the wall because MRA was so gung-ho to get going on my NEXT system, but you can see there’s a lot more storage capacity than any individual contributer really needs.

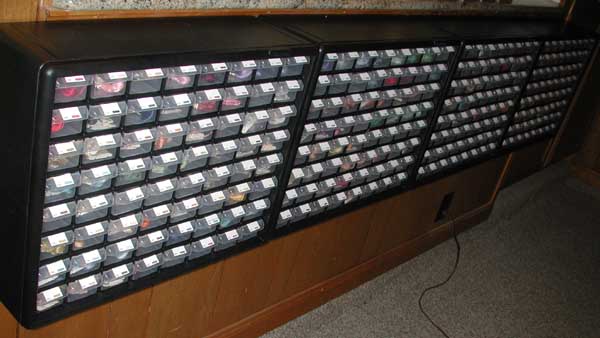
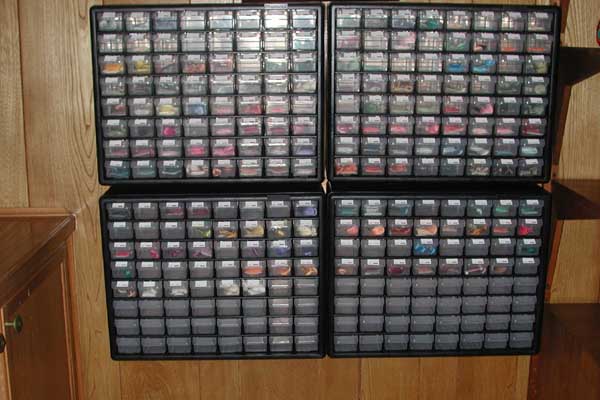
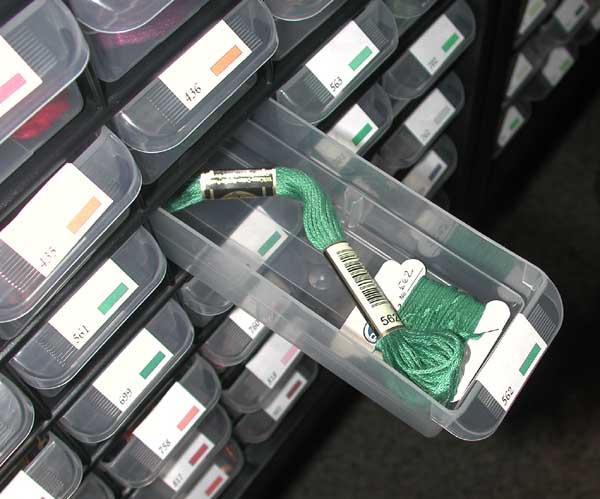
SO I bought a set of little drawers, one for each DMC color. There are 8 cabinets, each with 64 drawers. They’re made by Akro-Mils, part number 10164, and I got them on Amazon for $28.59 each and free shipping. Each cabinet is 20″ x 16″ x 6.5″. The drawers are 5.25″ long by 2″ wide and 1.5″ deep. They’re slightly too short for a skein of floss (it has to be curved a little to fit) and bobbins fit just fine. You can get maybe a dozen skeins in a drawer. There are 512 drawers and only 469 “normal” DMC colors (I’m excluding the variegated ones and rayon etc.) so I have some extra drawers for pearl cotton, needles, silks, beads, extra bobbins, etc.

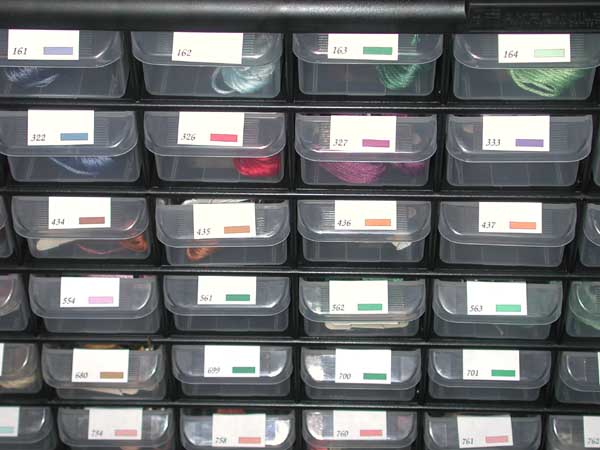
I also made a set of floss labels for the drawers with the number and a big color swatch. (People have been asking for something like this for a while, and we will make them available as soon as I work out the RGB values for the 16 newest DMC colors.) The labels fit pretty well on the drawer pulls and the color swatches are really helpful because you don’t have to look at every number — you can jump to the next drawer with approximately the right color on the drawer pull.

I think this will be my last system. The cabinets are reasonably compact (they don’t stick out as far as the hooks), they are not going to fall off the wall, and the floss is protected from dust. If you wanted to be a little more frugal with your money or your space, you could have 2 or 3 colors per drawer.

Framing needlework with fabric
Monday, June 22nd, 2015

I finished stitching my red alphabet about 5 years ago, and almost that long ago I bought the supplies for finishing it as a wall hanging, but only recently actually finished it. It came out pretty well. It’s not as flat as it ought to be and I hope some additional pressing will fix that. I had intended to write a tutorial on how to do this (not that the way I did it is the only way) but some things went wrong along the way that I can’t explain. Still, I can give you some pointers.

The first thing I did was fuse a sheet of fairly stiff Pellon to the back of the stitching. I had debated about whether I wanted to do this, but reasoned that if I decided it needed to come off, I could get it off again. Now I think that was the right choice because it will keep the stitching from sagging from its own weight. It was too big to block (on anything I had available) so I just went ahead and fused it. It didn’t come out 100% rectangular which made trimming the margins so they were all the same size tricky. I wanted to trim it so there was a 2″ border all the way around but because it was a little distorted in places, I couldn’t just measure 2″ from the edge of the stitching. I had to make marks at various places along the stitching and then draw a line that went through most of them. (I would have liked a larger border but the designer was seriously confused about how big each block would be and once I figured out what the real size would be, there wasn’t as much extra fabric as I had intended.)

In retrospect, I think I should have cut a paper pattern the size of the stitching, pinned it to the front of the fabric, and made sure that the edges and corners of pattern and stitching were aligned with each other, then fused it.

Next, I basted a piece of the backing/frame material (red and white ticking) to the back.

I decided to use 1/2″ seams to make calculating sizes easier. I chose 2″ for the frame width, which means, allowing for seams and the back of the frame, that the pattern pieces for the frame need to be 5″ wide. The frame pieces were shaped like this:

The end points should be right angles. The long side should be the same length as the side of the fabric (edge to edge). I folded the pattern in half to find the center and aligned the center with a line on the fabric. (It would be easier to use plain fabric. If you are stitching a cross-stitched picture, it would look better than patterned fabric anyway.)

To stitch the frame to a side, start 1/2″ away from the edge (or whatever you are using for the seam allowance) and end 1/2″ from the other edge. The seam allowances need to be free to make the miter. Be careful, when attaching an adjacent piece of the frame, not to stitch past the point where the stitching on the first piece ends. The 3 seams at each corner (horizontal, vertical, and diagonal) have to just meet. It’s better to have them not quite meet and fill in the hole by hand than have any of them cross. Only stitch from the corner close to the needlework to 1/2″ away from the point.

Now press the frame away from the stitching. Press under the seam allowances on the back, and fold each frame piece in half and press. For some reason I haven’t worked out, the back was too big! I had to trim the ends of the frame. I pressed under the seam allowances on the diagonals, whipstitched the edges of the frame to the back just over the seam line, and then stitched the diagonal seams at the corners.

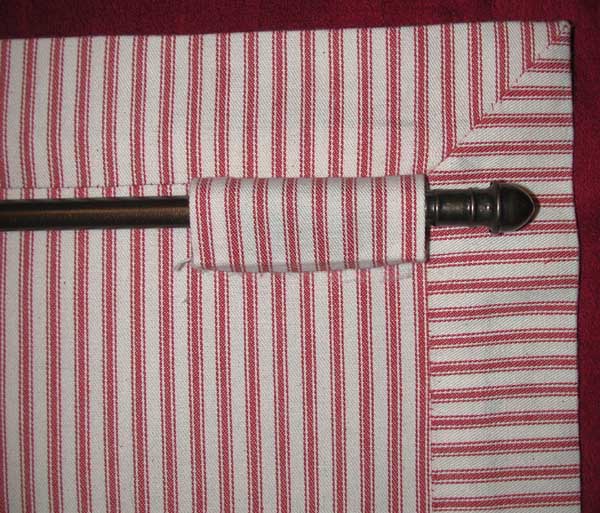
I cut 2 4″ squares of the ticking, turned under opposite sides, and folded them in half and stitched the ends together to make tubes. I turned them inside out and fused them to the back corners of the stitching. It would have been better to make 3 (or even a continuous pocket) and to attach them to the top of the frame. Since they’re only fused, that’s easily corrected. You might want a rod at the bottom too to make it hang straight, and maybe attach a couple of curtain weights.

The fact that the lines in the ticking meet almost perfectly at the corners, is, I believe, dumb luck. Or “miracle” might be a better word. I think it is just an artifact of the size of the fabric and the spacing of the lines. I did envision that happening, but I don’t think I had any right to expect it.

I may make a small model and try to figure out my mistakes so that I can write a tutorial. I realize that this description is too vague for anyone but a pretty experienced sewer to be able to follow. I do like the “frameyness” of it with the mitered corners and the supplies were only about $10 instead of $x00 for having it professionally framed.

Another way you could do this would be to finish the needlework by itself, without a frame, and then make a backing piece as a separate piece and then join them. Get a piece of backing material for your stitching, and put the right sides together. Stitch just past your cross stitching on 3 sides, trim the seams, turn it right side out and press. Hand-finish the 4th side. Now do something similar with two pieces of framing/backing material to make a separate, larger, rectangular piece. Finally, attach the stitching to the larger frame piece. Or rather than sewing a backing to the cross stitch, you could just turn the edges under and then fuse it to your frame piece. No mitering, no patterns needed, and less sensitive to miscalculations. Just center the stitching piece on the underneath piece.


Dritz Tailor’s Marking Set
Tuesday, April 21st, 2015

A couple of people recommended the Dritz tailor’s marking set to me. I got one and have been using it for a while, and wanted to share my thoughts.

First, it’s a really nice product. It’s essentially a mechanical pencil with a soft grip. It uses ceramic leads (I don’t quite know what that means) and comes with 9, 3 each in white, green, and hot pink. They make very fine marks so it’s great for gridding. It has an eraser that removes the marks, but you can also remove them easily with a damp cloth. I have not had any trouble with the lines rubbing out before I’m finished with them. It will certainly last me the rest of my life, though lead refills are available. There’s plenty of eraser. It winds out when you twist the barrel of the pencil, and it’s about 1″ long. The refill package includes a new eraser.

The big disadvantage is that it’s pretty expensive for a marking pencil — you’ll pay $12-15, probably. However, when you consider what standard fabric markers are like, it’s probably worth it. Felt tip pen markers always seem to have dried up by the second time I use them. Fabric marking pencils (in my experience) somehow acquire numerous breaks in the lead, so that when you go to use them, you just have a jagged pencil end. You sharpen the pencil and then the next little segment falls out. Even if the lead isn’t broken, you can never get as fine a line as is possible with this pencil.

I looked at the reviews on Amazon. The people who didn’t like it said that little bits broke off every time they marked with it (I haven’t had that happen), or that it doesn’t leave a good mark on delicate fabric. I can imagine that since it’s a pretty hard lead, but on cross stitch fabric, it works fine.

Is it worth the money? Probably, depending on your finances. As you can tell, I had pretty much given up on fabric markers, but now that I am using it for my horizontal grid lines, instead of sewing them, it is saving me a lot of time. It’s true that conventional pencils cost a lot less, but you don’t have to use up very many of them sharpening them before you have spent as much as this one costs. And it’s worth pointing out that it is not expensive compared to a decent mechanical pencil, only compared to crummy fabric pencils.

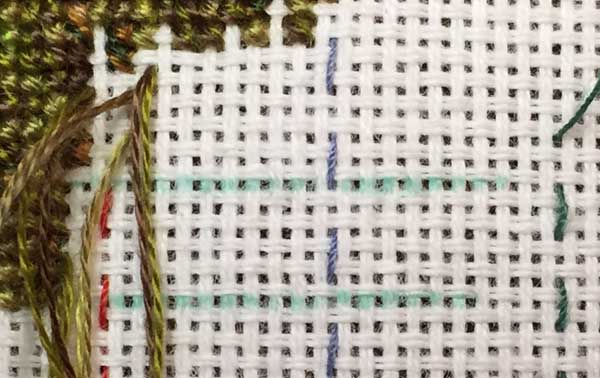
Here’s what the lines look like on 22-count aida:


DMC colors
Wednesday, August 20th, 2014

You may know that DMC has, over some period of time, changed some of their dye formulas. I believe this has mostly been done to bring them into line with changing regulations on toxic materials in dyes, but they say it can also happen if the availability of raw materials changes. The result is that some of the colors are different than they used to be. A few colors ended up being so close to another color that they “merged” the colors. They don’t say they discontinued any colors; they just print two numbers of the labels of 7 colors of floss. You can read more about that here.

The obvious question is, which colors are different than they were 12 years ago, and how different are they? I couldn’t get an answer. The solution seemed to be to get a brand-new skein of each color. Going to Michael’s and picking out all that floss sounded time-consuming and expensive, plus there’s no way to know how old their stock is. I’m sure our local Michael’s turns over their stock regularly, but how long has it been sitting in the warehouse?

It turns out that DMC has a designer program, in which they will provide designers who use DMC materials all the free floss and fabric they need for models or whatever purposes they may have. So I applied and was accepted and requested one skein of each color, including their 16 newest colors. (These new colors come only in a set currently. DMC says they will be available in open stock “in a couple of years”. We will not be using them in our patterns until you can buy only what you need — imagine if you needed 4 skeins of one of the new colors and had to buy 4 sets!)

They came yesterday.

Now begins the lengthy task of, first, determining which colors have changed; second, working out new RGB values (computer color definitions) for them; and third, modifiying the patterns that are affected. I hope that most of the changes will be minor. In any case, because most colors in our patterns are blends, and not used in large solid areas, the impact on our patterns should be slight. In other words, go ahead and stitch the patterns you have with the floss you have, or new floss, and don’t worry about the outcome.

By the way, there are a number of DMC colors (about 25 I think) that were new several years ago that we have never added. We will be adding those colors, now, as well.


Ancient astonauts
Monday, December 9th, 2013

OK, so maybe no astronauts, but I do have an ancient UFO!

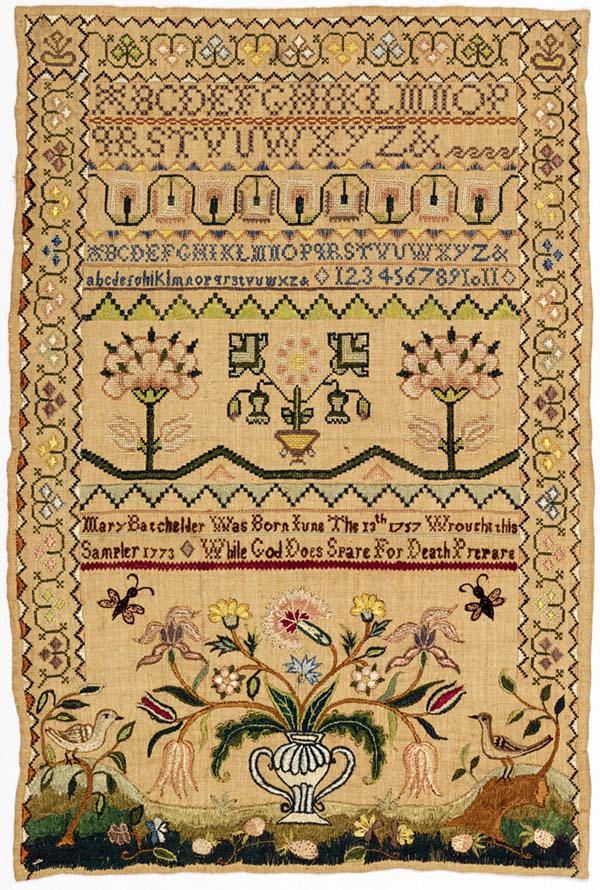
This was a stamped fabric kit put out by National Paragon Corporation in 1978 including “Peri-Lusta” Filo floss (which is in the vintage category now), and I was given it right around that time. It was SO long ago that I can’t remember who gave it to me. It’s based on a sampler in the Cooper Hewitt Museum which was stitched in 1773. I never cared for the colors. They don’t seem samplerish (by which I guess I mean not historically accurate) to me.

I did all the cross stitch and lettering (which is stem stitch where it isn’t cross stitch) in maybe 2 or 3 years. (Or could be less — it shouldn’t have taken very long — but I don’t remember.) Then I ran into the bottom which is mostly satin and long-and-short stitch, which I dislike intensely. So I put it away and worked on it intermittently, eventually just taking it along on trips because I didn’t care if it got dirty. It has been to west Texas a good many times, and I can tell you that stitching in the car is not helpful to your eyes OR the work. I finished it in May, 35 years after I started it, and finished signing it last night.

I used Transfer-Eze for the signature. It’s a sort of fuzzy sheet with a backing. You print out whatever it is you want to transfer on a computer printer, or I suppose you could draw on it, then peel off the backing and stick the stuff to your fabric. Then you stitch over the lines. When you’re done, it dissolves in water and the marks which were never actually on your fabric go with it. Pretty cool!

I washed it today and boy was it dirty. Now that it is clean and pressed and FINISHED, I feel more kindly toward it. I still don’t know that I will frame it — it’s very large and the colors don’t go with anything, so it will probably join its compatriots in my bottom drawer but I don’t hate it any more. I got curious about the original and found it on the Cooper Hewitt website.

It’s silk embroidery on linen and uses satin, cross, half-cross, eyelet, rococo, chain, and roumanian stitches. (The kit didn’t have all those.) Obviously, it’s faded, and perhaps dirty, but the colors were obviously subtler even to begin with.

It was a great day for me when people stopped giving me kits…


Joining two pieces of fabric
Monday, July 1st, 2013

Let’s start by saying that joining two pieces of fabric for a single cross stitched piece is not a good idea unless you are making something the size of a theater curtain. But occasionally people find (after they are well into a project) that their fabric is too small. This can happen because they calculated the size wrong (we recommend using our fabric calculator) or because the weave is not quite what it is supposed to be. Always check!

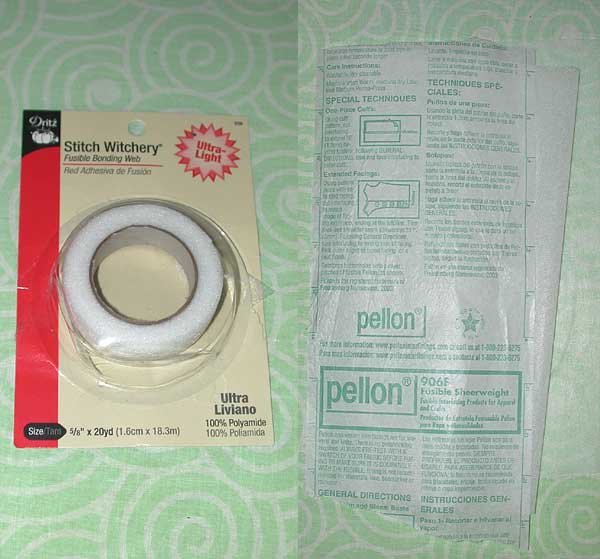
I tested my ideas about joining two pieces of fabric on scraps of aida and linen. I bought some Pellon fusible sheerweight interfacing and some Stitch Witchery.

The Stitch Witchery is just a band of adhesive. It’s really for putting between two pieces of fabric, say if you need to fix a hem and don’t feel like sewing it. I knew that but thought it might work to bond it to the fabric with a piece of tinfoil on top. Unfortunately it bonded very thoroughly to the tinfoil as well as the fabric.

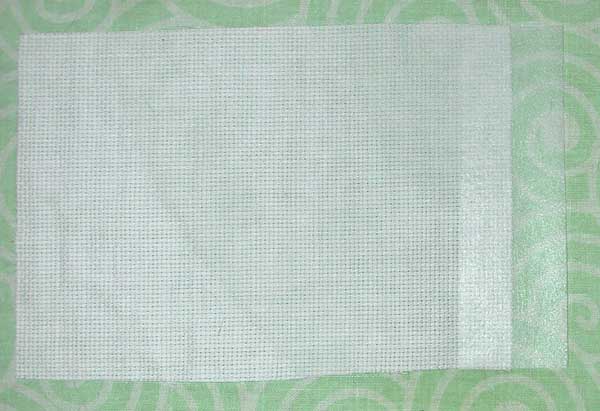
The Pellon is a non-woven, very sheer interfacing with tiny glue dots on one side. You can see it there, sort of (sorry about the terrible pictures) — it’s the white stuff to the right of the Pellon label. And don’t be like me and get a piece that doesn’t include the instructions for fusing it!

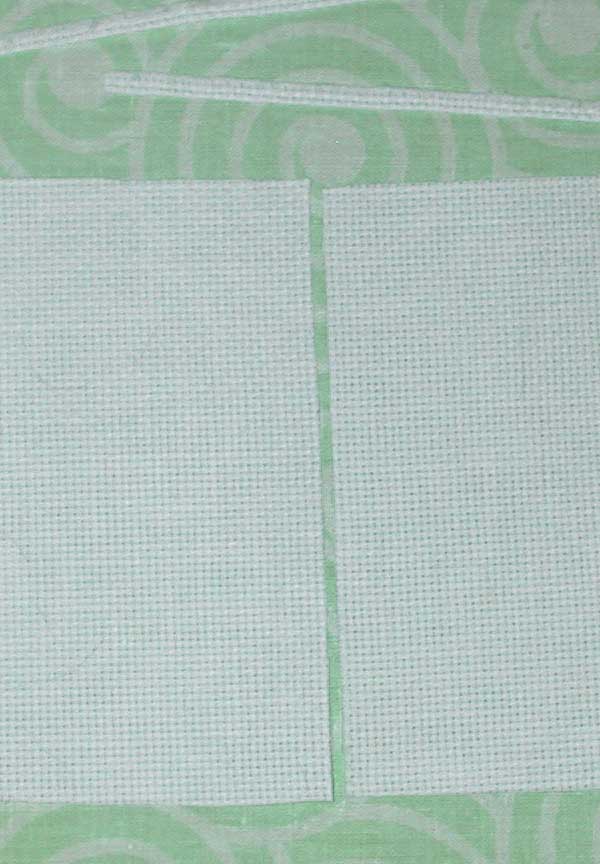
Start by pressing the fabric on the appropriate setting (cotton or linen), then trimming the edges you want to join so that they are perfectly straight and there are no frayed bits. Trim between the threads. (It’s the vertical edges in this picture.)

Cut a strip of Pellon about an inch wide and the length of the sides you need to join.

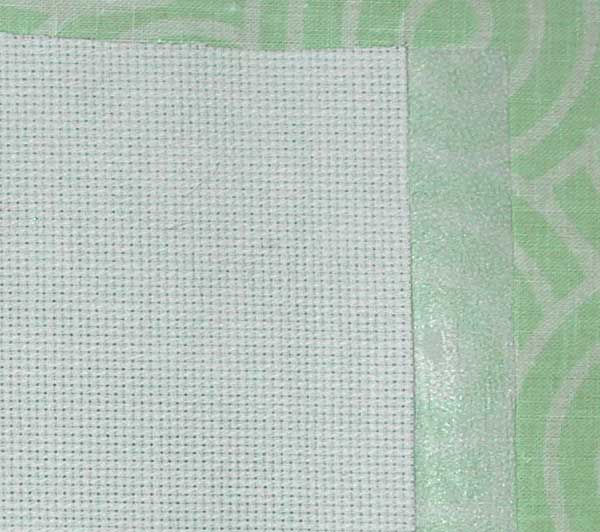
Put the strip of Pellon with the glue side up on your ironing board. Put one piece of fabric on it so that half is under the fabric and half is sticking out. You are going to fuse the fabric one piece at a time to minimize the chance of it shifting.

I had to search for instructions for fusing the stuff and this is what I came up with. Follow the instructions that come with your Pellon if they’re different. Set the iron to the polyester setting. Put a damp press cloth over just the part you want to fuse. Something without a hem would be better. The hem is over a little of the exposed glue dots — I only pressed up to the hem. Put the iron down on the press cloth and leave it for about 10 seconds. Don’t rub it around. Just set it down and leave it in one spot.

After 10 seconds, pick up the iron. The press cloth should be dry where the iron sat. Let the fabric cool and check the bond. Apply more heat if it doesn’t seem completely fused. Continue in sections until the Pellon is all fused to one piece of fabric.

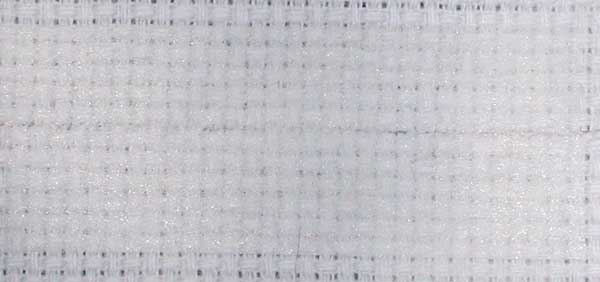
This is the back (glue dots down).

Now, with the glue side up again, carefully put the other piece of fabric on the Pellon butting up against the first piece of fabric. You have to make the threads that go across the join line up. This is where you will wish you were dead, but don’t despair — a little patting and prodding and it will work out. Carefully put the damp press cloth over the whole thing. Tap it briefly with the iron, then peek and make sure it didn’t somehow shift. Then finish fusing it. Here is the fused piece with the Pellon on the bottom. Pretty good!

Now just continue stitching. When you get to the Pellon, you can still see the holes but you can’t really find them with your needle anymore from the back. I ended up doing this: before each “down” stitch, I poked a hole where the next “up” stitch would be. (You can poke a lot of holes in advance but they tend to close up.)

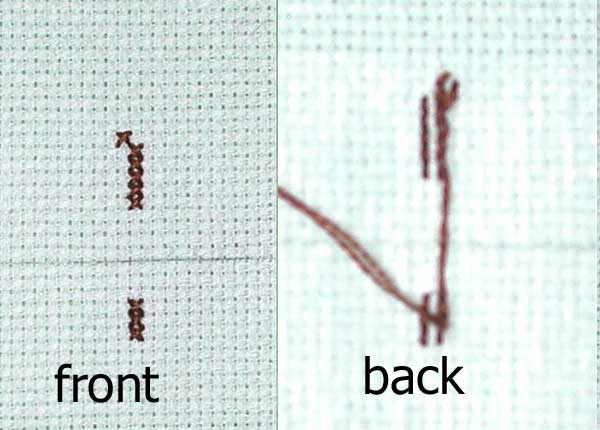
Wherever you can, carry the thread across the join, like this, even if you are carrying the thread a lot farther than you normally would:

This will strengthen the join. The Pellon is not very strong by itself. (There are stronger weights, but you need to be able to see through it.)

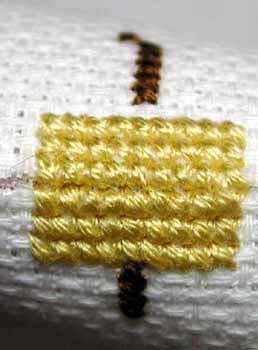
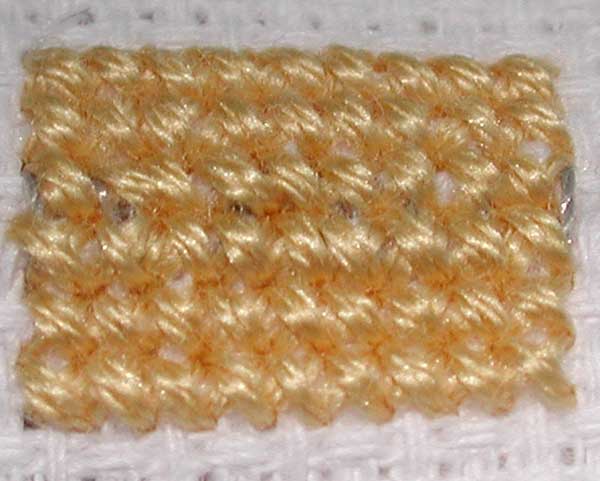
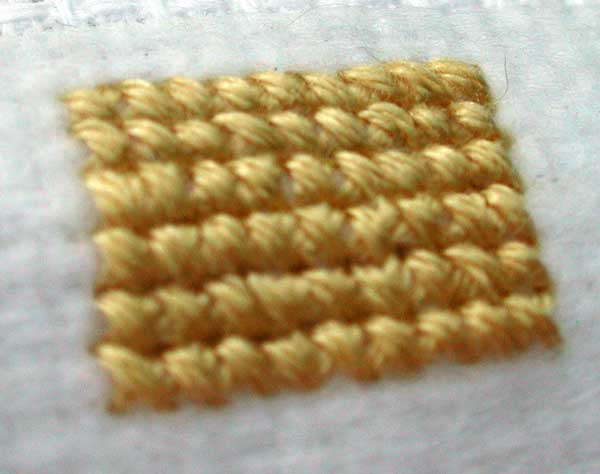
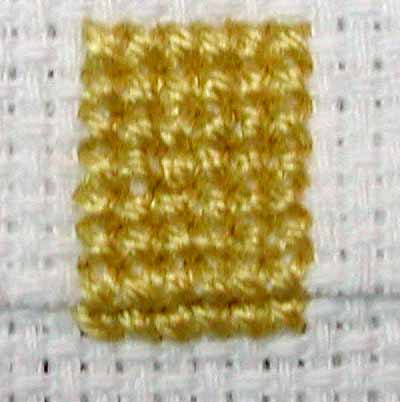
Here’s a little swatch stitched across the join. Can you see it? It’s between the 3rd and 4th row of yellow stitches. You can see it if you know where it is, but I think it would be OK. The problem is, since it is only reinforced on one side, it breaks to the front (right photo), so you would not want to use it for a pillow or anything that didn’t have firm support behind it.

To alleviate the break problem, I tried stitching with sewing thread across the join before cross stitching over it. I made the stitches 2 cross stitches high and just used ordinary sewing thread. I used gray because there was a spool sitting right there and I figured the stitches would be covered by cross stitch.

It helped with the break problem but the thread did show. The little fuzzy frayed ends got up into the stitches too.

So then I cut a strip of Pellon about half an inch wide and fused it over the join in the front. It’s harder to stitch through two pieces of Pellon than one, but not much. Just keep poking those holes. You can still see them — the Pellon fills most of this picture — compare the holes at the very top and bottom.

This is much better (regarding the tendency to break) and it is also stronger.

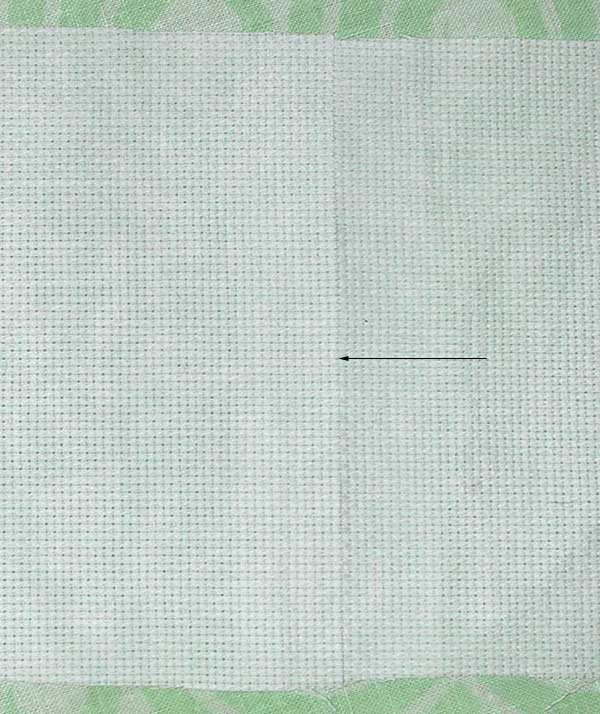
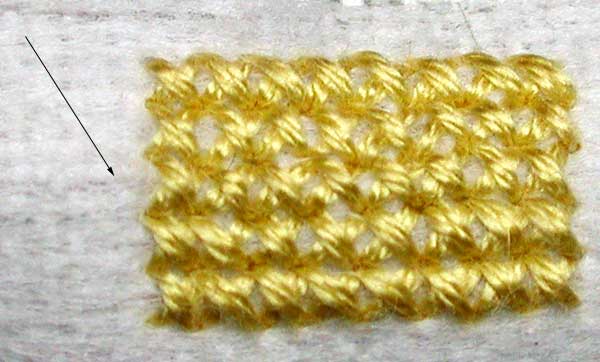
You can join linen in the same way, with one important difference: trim the fabric in such a way that you are cross stitching OVER the join (assuming you are stitching over two), instead of having the join between two rows of stitching. Count it, check it, and double-check. It won’t be terrible if you don’t get it right but it is significantly better if you do. The arrow points to the join. Although you can’t tell from the cropped photo, the fabric is curved and you can see a little break at the join where there is no stitching but the stitching is very flat.

For some reason the Pellon is coming loose from the linen. I don’t know why. It might be because this is a pretty loose weave, so maybe a lot of the glue dots are in holes. Once you have stitched over it all, it doesn’t really matter whether it is fused or not, but if I were doing more than a little swatch, I would refuse it. Having it coming loose makes it harder to stitch.

Do warn your framer about your join. The linen is stronger than the aida because it is stitched across the join, but you don’t have to pull too hard to see the join in the aida open up just a tiny bit.

Another possible way to do this would be to lap one piece of fabric over the other and have a section where you are stitching through two pieces. I haven’t tried that because I think it would make a bump. As soon as I typed that sentence, I decided I needed to try it.

I tried it 3 ways and found that it doesn’t so much make a bump as a wide place. I lapped the upper piece of fabric over the lower, reasoning that the light would normally be coming from above and this would be the best way to avoid a shadow. I now think that’s backwards — to avoid a shadow you want the lower piece lapped over the upper. Anyway.

I first tried overlapping the two pieces and starting above the overlap and stitching straight down. I didn’t pin the pieces and had a lot of trouble with the fabric shifting and pivoting. As you can see, the last row of stitches (where the overlap ends at the bottom) is wider than the rest but even worse, the next row is too narrow.
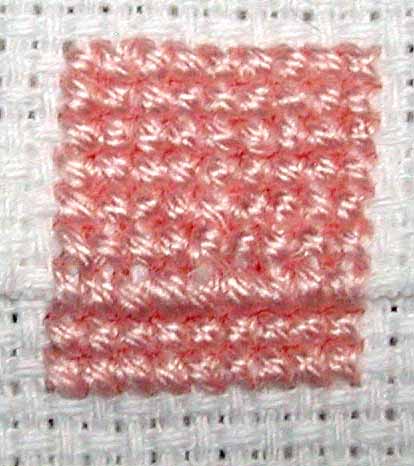
Next, I tried stitching the bottom row of the overlap first, and continued with the two rows below that. Then I went back up above the overlap and stitched down to the row I had stitched first. This time, I pinned it, which helped a lot. Also, by stitching the last row of the overlap first, it was easier to get the holes lined up for that row. It still is noticeable though. It seemed to me that now the problem was cumulative error in lining up holes pushing toward the “bump” row.
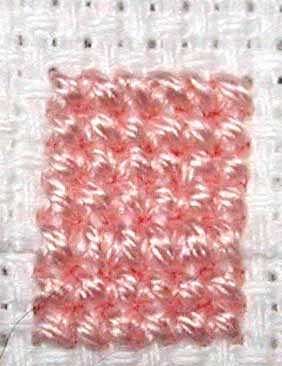
Finally, I tried starting with the bottom row of the overlap, then stitching the two rows below it, then turning the fabric upside down and stitching away from the “bump” row. This worked better and it was a little easier to line up the holes. They never really do line up, though. You have to find the hole on the bottom piece of fabric and then feel around in the top piece until you find the hole. And although this is a small sample and it’s hard to tell from the picture, the bottom row of the overlap IS noticeably wider than the surrounding rows. It is no worse than the effect you get sometimes stitching on linen when the weave is uneven, but you can see it, and in a row two feet long, it might be quite noticeable.
So, if you have to join two pieces, you have a choice between an invisible but somewhat weak join using Pellon, or a really strong but noticeable join overlapping the fabric. (My overlap was only 5 rows but it is rock solid.)


Tapestry needles compared
Wednesday, November 14th, 2012

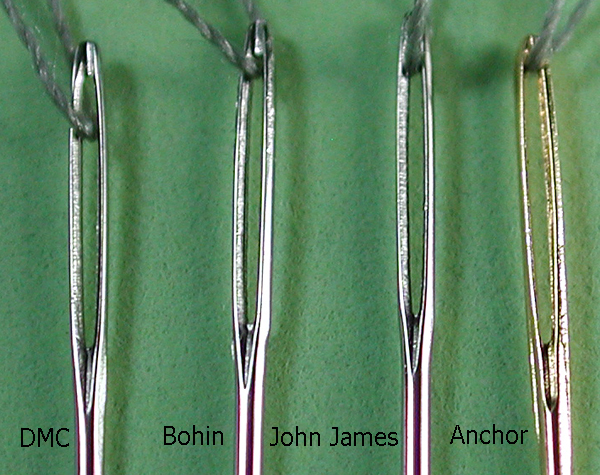
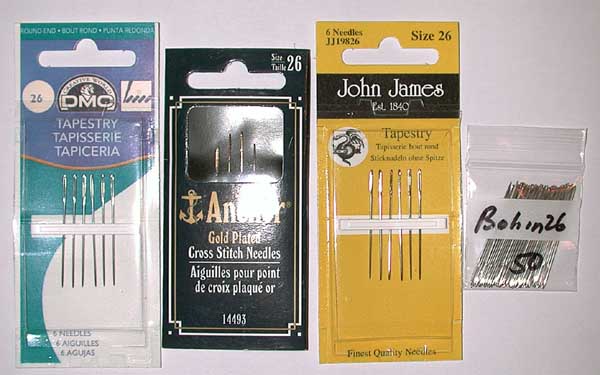
I thought it would be interesting to compare some different brands of tapestry needles. Is there a best kind? I looked at four brands: DMC, Bohin, John James, and Anchor.

There are a bunch of other brands — a quick search on Amazon turned up Dritz, Susan Bates, Colonial, Mary Arden, and Piecemakers. The needles I used were all brand new out of the package. I used size 26 because that’s what I like to stitch with (I know many of you prefer the smaller size 28, but I have trouble with the eyes breaking).

I took some measurements with a dial caliper accurate to 0.001 inches.

Most were about the same length, with the Anchor being a little shorter:

       DMC - 1.344"
     Bohin - 1.343"
John James - 1.354"
    Anchor - 1.283"

They were all exactly the same diameter: 0.0235″ (in the middle). This should correspond to some wire gauge (and probably does) but it’s nothing obvious like 26.

Next I measured the thickness of the eye (by which I mean the direction that the thread goes through). There was more variation here:

       DMC - 0.0180"
     Bohin - 0.0190"
John James - 0.0185"
    Anchor - 0.0150"

It’s true that these are tiny numbers but note that Bohin eye is 25% thicker than the Anchor eye!

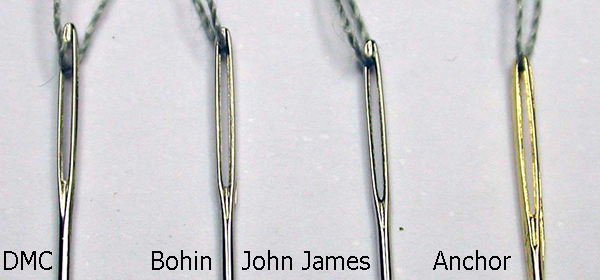
I also measured the width of the eyes (going across the opening, in the middle). This affects how hard or easy the needle will be to thread.

       DMC - 0.0330"
     Bohin - 0.0365"
John James - 0.0315"
    Anchor - 0.0340"

The first three eyes are similar, but the Anchor eye has a weird kind of flange along the sides. Maybe this makes it stronger.

The Anchor needles were gold-plated. Unfortunately this does not seem to be a good thing. They use such a tiny amount of gold which they have to be careful not to polish off, so you can see individual specks of gold and the Anchor needles feel a little rougher than the others. But I could be imagining that just because they LOOK rougher. I couldn’t tell any difference in the smoothness of the other brands (which I believe are all nickel-plated).

I tried to get a sense of their relative sharpness. For a tapestry needle, blunter is better, to reduce the chance that you’ll split a thread. My unscientific method was to take two needles at a time, holding them together, and scratching them along a piece of paper, and looking at which made more of a scratch. My conclusion was that the sharpest was Anchor, followed by John James, followed by DMC and Bohin (I couldn’t tell any difference between those two).

Another consideration is how rough the inside of the eye is. It’s possible to see (under magnification) that all of the needles are not smooth inside, and I suspect it’s not possible to polish the inside of a machine-made needle. I don’t know if there is any difference, although I swear I have had needles that could have doubled as thread cutters. One might measure it by scraping a thread back and forth along the inside of the eye and count how many times it takes before the thread breaks but this seems like a lot of work for an inconclusive result (the pressure would probably vary).

This is not a great picture but you try taking a picture of the inside of a needle’s eye! You can see that all the eyes are rough(er) inside. The Bohin needle seems to have some roughness on the outside as well. Examined under a 9x jeweler’s loupe, I could see that all the needles have some marks on the outside of the eye, mainly on one side. This is apparently an artifact of the manufacturing process.

Regarding price (and this is just what I paid; your mileage may vary):

DMC is $1.25 for 6 or 21 cents each
John James is $2.00 for 6 or 33 cents each
Bohin is $11 for 50 or 22 cents each (or non-bulk, $2.12 for 6 or 35 cents each)
Anchor is $2.10 for 4 or 53 cents each (that’s the gold plating)

Other information:

The DMC package says nickel-plated steel, made in China, inspected and packed in England.

The John James package says assembled and inspected in England using needles imported by Entaco to our quality and specifications. Entaco is located in Redditch, England, but it doesn’t say where the needles are made. These needles are probably nickel-plated too. John James also makes gold-plated and platinum-plated needles.

My Bohin needles came in a tiny baggie so I don’t have the official package, but it is a French company and it seems that the needles are still made in France! The web site seems to indicate that the needles are nickel-plated.

The Anchor package says gold plated, made in India, Susan Bates Division of Coats & Clark.

The conclusion? Your preferences may be different than mine, but I like the Bohin needles a lot. They seem sturdy and well-made, and in bulk they’re very reasonably priced. The DMC needles are good too. John James has a reputation as a high-quality needle but I prefer a larger eye. I liked the Anchor least of all, with the spotty gold plating and weird and thin eye. The differences ARE small but in hours of stitching, they are not undetectable. I recommend that you experiment with different brands to see which you prefer.


Another floss storage system
Tuesday, June 5th, 2012

Another reader has shared her floss storage system with us! She says:

“I order the pattern booklet with three sets of labels.

“I attach a set of labels to floss bags on a ring. (I refer to this as “The Hold”.)

“Next, I take a razor blade and place it sharp side up in the crack of my dining room table formed by the leaf. I place a piece of tape 16” from the razor blade. I then take each color of floss and cut 16” lengths until done, and place them in the corresponding floss bags. (“The Hold”)

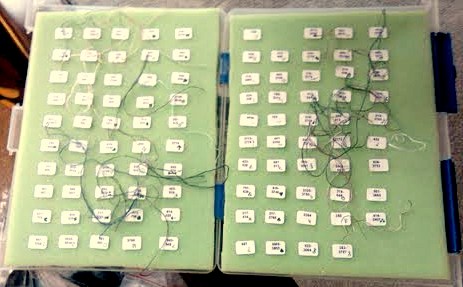
“I purchased a 1” deep plastic container with a hinged cover. I placed 1” thick, dense foam in both sides of the container. I then attached the second set of labels in rows onto the foam sides. I purchased enough needles to fill each spot. I load each needle with the appropriate color of floss. (I refer to this as “The Deck”.)

“I then made several 3” by 6” cards, running holes down both sides with a hole punch, and attaching the third set of labels next to each hole. Placing one hole in the left corner of each card, and putting the cards onto a ring through these holes. I loop three floss lengths per symbol through the holes.(I refer to this as “The Cache”.)

“Now when I am ready to stitch, I take the needle from The Deck corresponding to the symbol. When I run out of floss in the needle, I take from The Cache. When the Cache become depleted, I pull from The Hold.”

What do you think?


My needle book, much better
Monday, May 7th, 2012

I decided I really can’t do without my blend bobbins. The reason is all of the parking I’m doing — sometimes I have several needles with the same color parked in different places, and as I finish them off it doesn’t make sense (to me) to leave 5 needles threaded with the same color, so I keep one threaded and put the other pieces back on the bobbin. If I had 1000 needles, I’d probably feel differently.

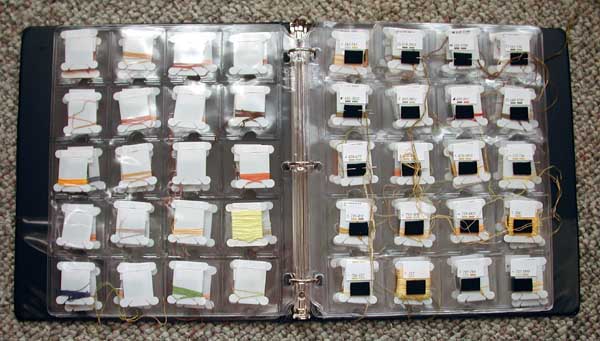
I was going to sew pockets on the felt sheets but then I thought, maybe there is something that already has pockets. It turns out that plastic pages for holding 35 mm slides have the right size pockets, but the camera store that used to be near us is gone, and I couldn’t wait, so I went to Hobby Lobby and got some coin pages instead, which also have 2″ pockets. They are pretty heavy duty plastic; probably heavier than slide pages would be. I am not sure which is preferable.

I stuck a floss label at the top of each pocket. I had a sheet of self-adhesive felt (with a peel-off backing) which I cut into small pieces and stuck to the pockets below the labels. These will hold the threaded needles. (White felt would have been more attractive but black was what I had, and after the minor miracle of being able to FIND it, it would have been a shame not to use it.) I put the pages into a 3-ring binder and ta-da!

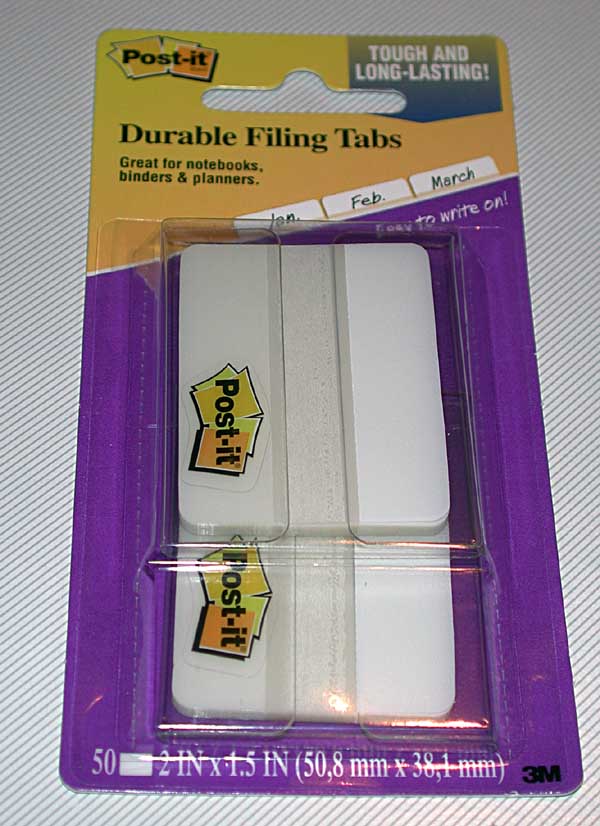
After working with this for an evening, I felt that there was one thing missing — tabs, so I can turn to the right page. I got these at Office Depot:

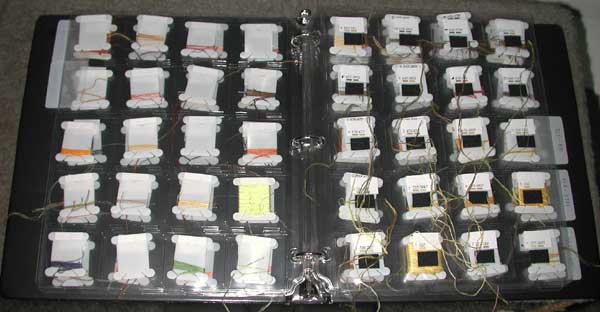
I think they’re meant to be stuck to the front of the page (because one side of the tab is easier to write on than the other) but I hadn’t left room so I stuck them on the back. Now my book looks like this:

Each tab has on it the range of numbers on the NEXT page. I didn’t get that right at first. You don’t need a tab for the first page because it’s right there when you open the book. The tab on the first page has the numbers for the second page, so when you open to that tab, it’s the second page. It’s hard to explain, but think about using tabbed dividers — you put the divider BEFORE the page you want to open to.

This is pretty nice now. With the parking, I have lots of colors going at once and although the needle book is a little cumbersome, it is much faster to find the right bobbin/needle than searching through the jumble of active bobbins I was keeping in a shallow box. It is also faster to jab the needle into the little felt swatch than to wind the floss around the slots in the bobbin (which is what I was doing with the threaded needles before). Because of the plastic behind the felt, you can do it one-handed. If you can’t find the self-stick felt, you could use velcro dots (just the soft side).

Update 5/8/12: Another thing further experience has taught: Put the numbers for the current page on the back of the tab. So the tab on page 1 would have the numbers for page 2 on its front, and the numbers for page 1 on the back. This way when you are open to a later page, you can get back to an earlier one without hunting.

Further update: 5/9/12: When I sat down to stitch last night, the first needle I took up was gummy. So instead of spending half an hour stitching, I spent half an hour using Goo Gone on my needles and putting them back in the felt making sure that they didn’t get down into the adhesive. I think the best option, therefore, is to use adhesive velcro dots. They have a tightly woven back between the fuzzy stuff and the adhesive. You could perhaps glue plain felt to the sheets, but that seems like a lot of work with a doubtful outcome. I tried superglue, which at least dries hard, but it didn’t hold the felt very firmly, and if I superglued 100 pieces of felt I’d end up with all my fingers glued together.

One more thing: 5/14/12 I found adhesive velcro strips which I can cut into rectangles that will be a better shape for needles than dots (and more cost-effective). I’ve also discovered it’s a good idea to loop the floss once around the needle to keep it from coming off when I flip pages.


My needle book, first pass (what not to do)
Sunday, April 8th, 2012

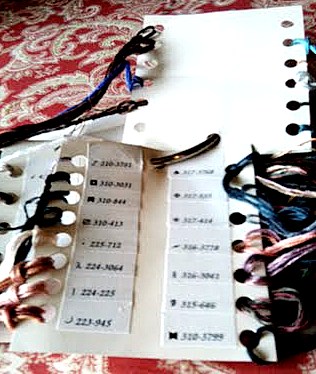
Here is my first attempt at a needle book. How many problems can you see (besides being sideways — you don’t get credit for that one)?

First, the felt. It is “made in the USA of 100% eco-fi (polyester made from recycled post-consumer plastic bottles)”. While this sounds good in theory, it’s irregular in thickness, slick-feeling, and just plain nasty. You can see how plasticky it looks, and the floss labels don’t stick to it as well as they might. This is all JoAnn and Michael’s had. I don’t know if anyone has cotton felt anymore — maybe you can buy it by the yard if not by sheet (I didn’t look at the yard goods at JoAnn). If not, I’ll probably get some flannel and sew it into a double thickness.

Second, if you want to put your “pages” into a notebook, cut the felt so that it fits before you do anything else. These felt sheets were 9″ x 12″. The width was OK but I should have cut the sheet to 11″ so it didn’t stick out past the end of the notebook.

I had a bunch of 1/4″ grommets so that’s what I used but this limited me to a pretty small binder. Most of my binders have rings that are too big for 1/4″ grommets. (SOMEONE who lives here but is not me ruined my grommet hole-making tool — looks like he hammered it. What on earth? I don’t know if it would have been able to cut through this plastic felt even if the edge was intact.) If you want to use grommets and don’t already have some, they do come in bigger sizes.

I intended to use a portrait orientation so that’s why the labels are attached the way they are. (Be careful not to stick the first label too close to the edge. I did and had to move the whole first row, which doesn’t improve their stickiness.) Once I was done with the labels and the safety pins, I started looking for a notebook and realized it would be nicer if the notebook was set up like an easel. (I actually have a notebook that stands up — the cover is hinged horizontally and it stands on the edge of the cover with the spine as another leg. But the rings are too big for my grommets.) Turning a standard binder sideways will work — you just need to tether the covers together about 6-8″ apart so it will stand up without collapsing.

Because of the way I stitch (lots of parking and no leaving vertical gaps) I often have 2 or 3 lengths of a symbol, so I need someplace to store these as well as a threaded needle. I guess if I really had a LOT of needles I could just put them all in the needle book, but what I have been doing is storing all the lengths on a bobbin, and only leaving one threaded into a needle. I thought I would use safety pins to wrap the extra lengths of floss so I bought a box of quilter’s basting pins. This turned out not to work very well. For one thing, they’re too crowded. It’s awkward to wrap floss onto the safety pins when they’re so close together, and spacing them farther apart didn’t really help. It’s just difficult to wrap floss around something that’s fastened down. And the pins are really too short. It’s a lot of wrapping.

This also suggests that wrapping the floss around a threaded needle may not really be that great an idea. My experience with having a lot of colors parked is that while the floss looks like it’s in a terrible snarl, most of the time I can pull the strand I need free without any problems.

My next idea was attach bobbins to the felt. I sewed 4 bobbins to another sheet to play around with but this seems very awkward too. (And the sewing would be a whole separate issue, but one I don’t need to solve, now.)

I am currently playing around with attaching bobbins with velcro. If you put the hook side on the back of a plastic bobbin, it will stick to the felt. (It probably needs to be a plastic bobbin or a thick cardboard bobbin so it doesn’t get bendy from being pulled off.) Unfortunately, with this felt at least, only a few times of pulling the velcro away creates a long tail of loose felt fibers. It looks like a better approach is to put the hook side on the felt, and the soft side on the back of a bobbin. The velcro sticks well to the felt and to the bobbin, but the bobbin can be pulled off easily (I’m using half of a 1/2″ dot). I could use my existing bobbins which already have the labels on them. The velcro needs to be near the top of the bobbin so that the floss, wrapped at the bottom of the bobbin, doesn’t risk getting caught on the hook side of the velcro.

Or I could just get a LOT more needles to allow for having 2 or 3 threaded per symbol. Right now that sounds the simplest.

Last idea: you know the tabbed dividers you can get for 3-ring binders? You can get just the tabs, with peel-off sticky backs, to stick to anything you like. Those would be nice (I think) to label the range of numbers on a page so you can flip directly to the page you need.

Incidentally, I did look a long time at the foam sheets — some people have commented they stick their needles into labeled foam sheets. It seems like that wouldn’t work unless you got them ALL onto one page, and that seems like it would be awfully crowded. But clearly, it works for some people, and I haven’t tried it (yet).


Privacy policy | Return policy | Site map | Member services | Contact us | Help
Copyright © 2002-2024 Scarlet Quince, LLC. All rights reserved.
You are welcome to link to this page but you may not use words or pictures on another site without written permission.